Peppers are the simplest garden vegetable to preserve! It literally takes just a few minutes to put a years worth of peppers in your freezer. Ready for it…. Wash, slice and put in a freezer bag. That’s it! No need to blanch them before freezing and certainly don’t bother canning them.
The frozen peppers are perfect for adding to soup, casseroles or in my household I use them most in jambalaya. Freezing them does change the structure a bit, they lose their crunch but who cares when you cook them anyways. You don’t even need to grow these yourself. If you see peppers on sale in the grocery store or there is an abundance at the farmer’s market put some in your freezer. You’ll avoid that $4.99/lb price in the dead of winter and you will conveniently have them on hand.
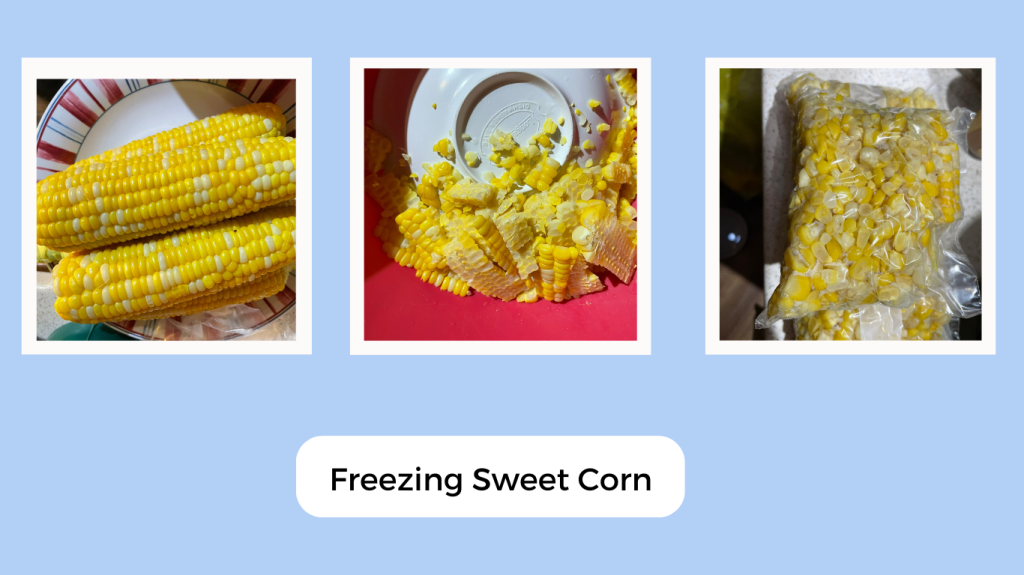
Eating garden, fresh tasting sweet corn in the dead of winter is pure joy. If you have never frozen corn before, you are really missing out! It’s such a simple task to do. I’ve tried to grow sweet corn in my garden and while it was successful, it just didn’t yield enough for the amount of time and expense. So this is one produce that I just plan on buying from a farm stand every year.
I have memories from my childhood of the whole family spending an afternoon freezing an insane amount, seriously it was many bushels. We each were assigned a task in the process, the kitchen was hot and it took several hours. My method is completely different, as I do it in small batches. I grab a dozen ears and boil all of it while I’m making dinner. We eat a few cobs and the rest I freeze, usually 3 bags worth. Over the course of the summer if you were to do this weekly you’d easily have a couple dozen bags worth tucked in the freezer.
The process is simple. Boil the cobs for about 5 minutes, cut the corn off the cob, and place in freezer ziploc bags or vacuum seal bags. I stack them in a single layer in the freezer until they are solid because the bags can get stuck together. Super easy and cheaper than buying from the grocery store.
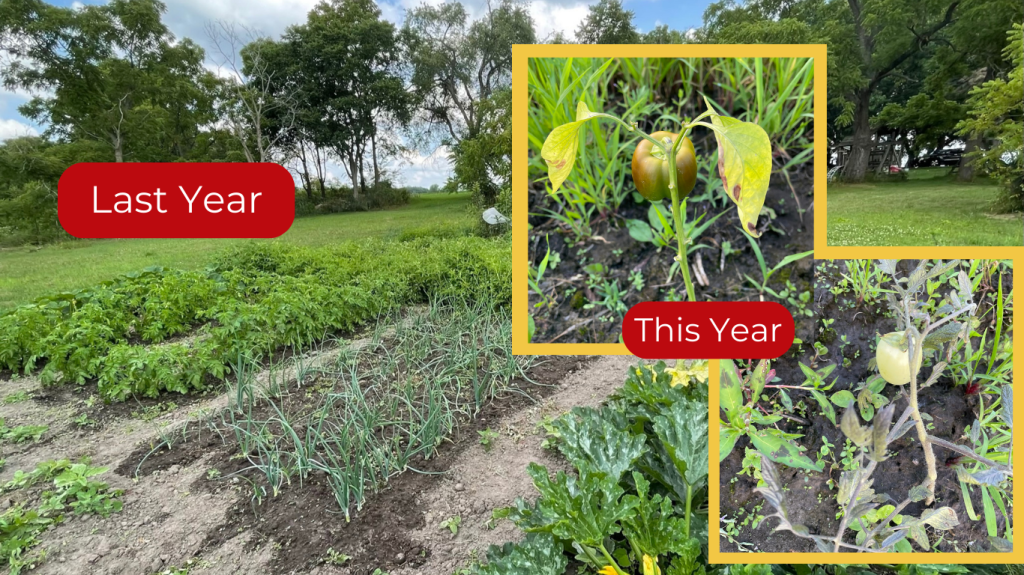
What a difference a year makes! Last year we were dealing with drought conditions most of the summer so I had to water my garden weekly, sometimes twice a week. Flash forward to this year and it doesn’t stop raining! My garden has been under water for most of the last 6 weeks, or basically since I planted my tomato plants. Last year I had lush, full plants and this year my plants are spindly, withering things.
There is no chance at this point of recovering this growing season so I’ll be buying produce from a local farm market stand instead. Thankfully it appears they haven’t had the same water problems I have. If you are in the same position as me, check out Flyte Family farmstands in Mauston behind The Log Cabin Deli, or in Necedah along the river.
Maintaining a garden can be a lot of work! Weeding, watering, and fertilizing for 3-4 months requires weekly hands on work. I try to work smarter, not harder so my method of gardening incorporates many facets into one task, mulching. I’m not talking about using landscape fabric. Using fabric is great at keeping the weeds out but it also causes soil compaction while eliminating healthy bugs like worms and nutrients you get from composting organic materials.
I like to mulch with things like newspaper, cardboard, grass clipings, and leaves. All of these items become compost food for worms. The worms break them down which then provides nutrients for the plants and improves the soil. As a surface barrier the mulch is holding in moisture (so less watering needed) and detering weed growth. Best of all, at the end of the harvest season it can be tilled into the soil right along with the dead garden plants. This is eliminates the need to add fertilizer. Bonus feature, these items are free!
This is how I build my mulch layer. Row crops like tomatoes and onions get surrounded by a layer of cardboard then topped with heaping piles of grass. The cardboard suppresses weeds, holds in moisture while the grass keeps the cardboard from blowing away. Make sure the cardboard is free of colored ink and wax coating. I use shredded newspaper for crops that aren’t in nice rows, like my strawberry patch. You can sprinkle the shredded paper around individual plants and top with grass. Newspapers should also be the basic black ink, avoid the colored ad inserts.
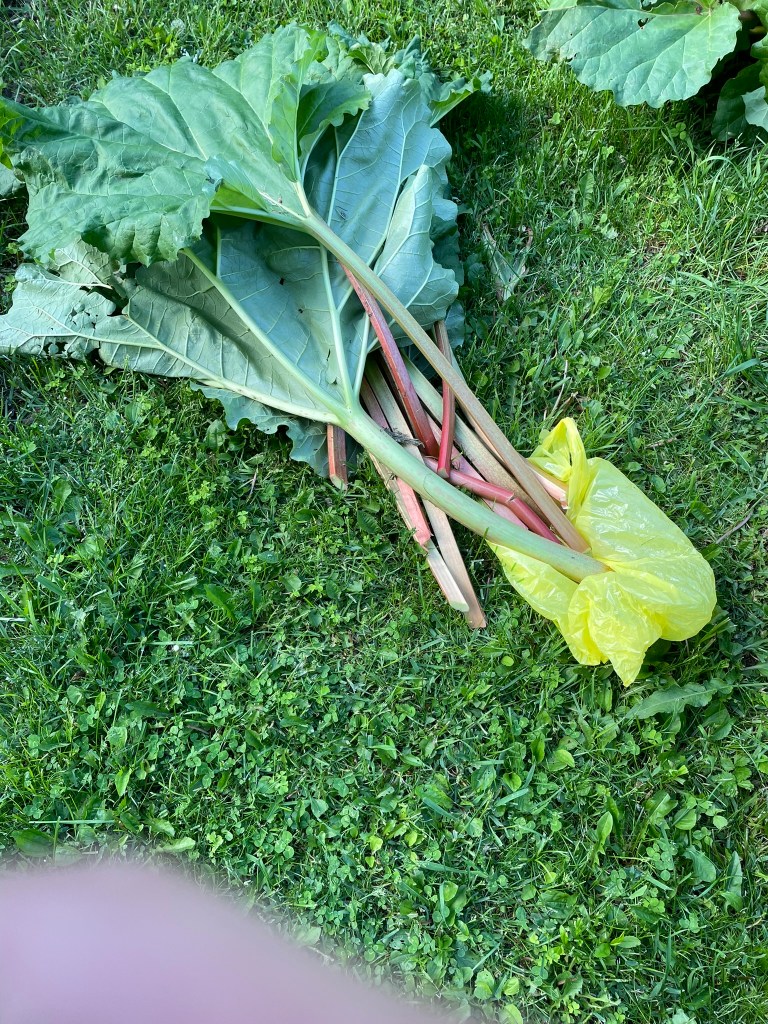
I also use other things for mulch like the leaves of rhubarb. They are huge! Plus you can tear the leaves to make it easier to wrap them around plant stems. Don’t worry, they may be poisonous to eat but they are perfectly fine to use as compost or mulch. In the Fall I will rake leaves from the surrounding trees to help cover the garden for the winter and come Spring what’s left will get tilled into the soil. This whole process is an organic way of gardening. I don’t need to add fertilizer and the organic items I’ve added to the soil also help to maintain moisture. This is working smarter, not harder plus I’m feeding the family food that is free from chemicals.
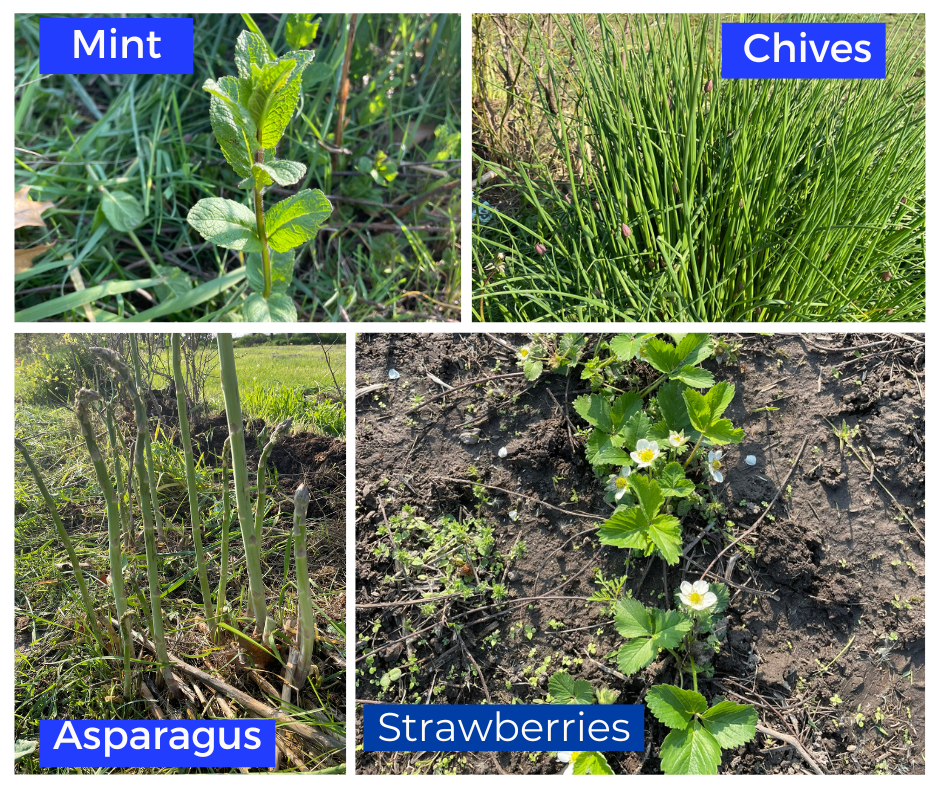
I’m fortunate that my garden has been in the same spot for the last 20+ years. It has allowed me to slowly add perennial plants so that at this point I am harvesting asparagus, blueberries, chives, mint, raspberries, and strawberries for “free,” an yes, there is a little bit of labor involved every year to pull weeds, prune or transplant new strawberry sprouts.
Asparagus is one of the few plants that is ready to harvest at the beginning of the planting season. The pictures above are the plants that are currently peeking up in my garden. I started picking the asparagus near the beginning of May and it probably has just a couple of weeks left to harvest. The local grocery store is currently selling it for $3.49/lb. You can buy the asparagus bare roots for $15 or less. It may take 2-3 years before the first harvest but the roots will sprout every year, indefinitely with no additional work from you.